It was a little more than a week ago when I received my first ever Fitbit unit, the Charge 2. My interest about Fitbit progressed after I posted their Holiday Gift Guide and I’m quite privileged to have received a Charge 2 for review. Here’s my review of the Fitbit Charge 2.
The Fitbit Charge 2 used in this review is provided by Fitbit Philippines via Strategic Edge, Inc. This does not, in any way, affect the outcome of this review which is based solely on my personal experience after a week of product usage.
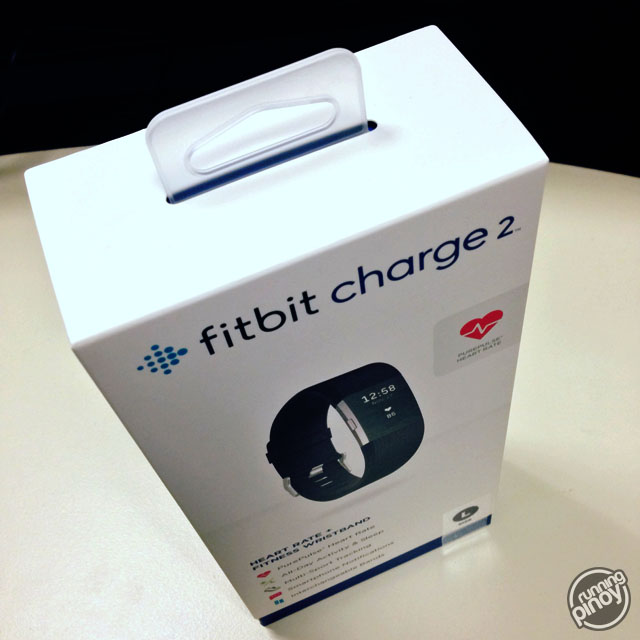
Unboxing
I was already reading some information online about the Fitbit Charge 2 (and other Fitbit products from the Holiday Gift Guide) when the unit I’m reviewing arrived late afternoon two Mondays ago. I was already very interested with the Charge 2 then so I was very excited to try it out the moment it arrived.
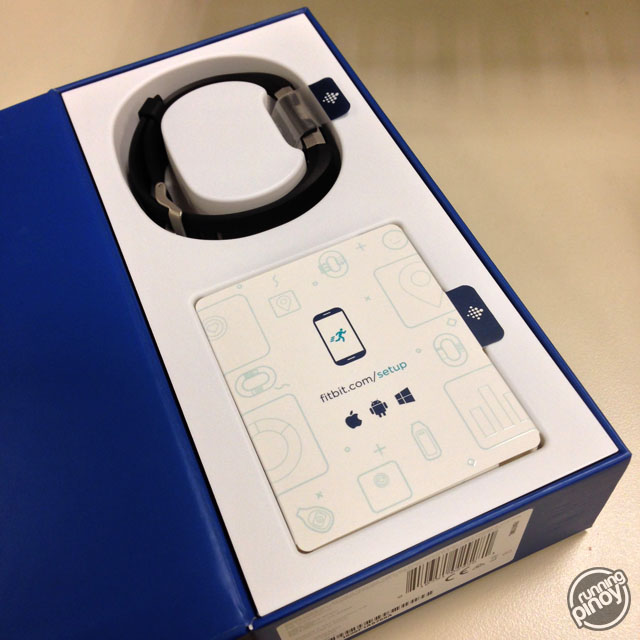
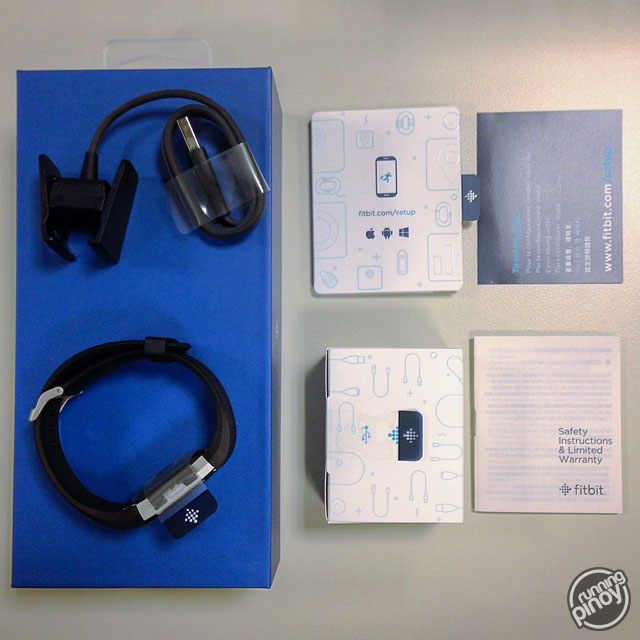
I was like a kid who received his most desired toy as a gift when my Charge 2 arrived! It took me a while to savor that moment and finally open the box. Deep inside I was thinking of doing an unboxing video but since I was at work and there’s not really an ideal place to shoot a video and I’m too excited to try it out, I just took photos. I guess I was too excited that I don’t really have a decent shot of the package contents so please bear with me:
Setting Up
After unboxing and a few photos, I finally switched on the Charge 2 for the first time and got this screen:
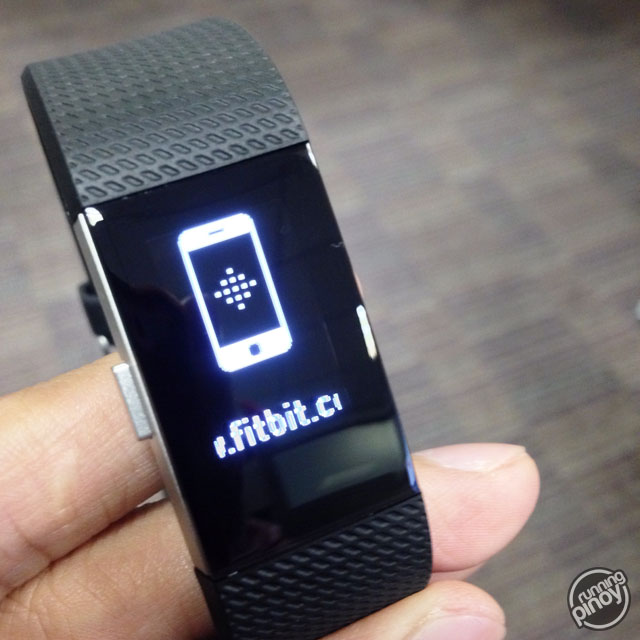
So naturally, I visited the address mentioned on the website. I was still at work so my natural instinct was to use a computer. From there, I realized that I should use a mobile device to make it work. Using my aged iPhone 5, that address brought me to the App Store to download the companion Fitbit App. The app is available at Google Play and Windows Store as well. This is where all the setup will be done as there’s nothing you can do on the tracker at this point.

Fitbit App
For this review, I would be using a Fitbit App on an iPhone 5 running iOS 10.2. The Fitbit App is an indispensable part of making your Charge 2 work. It serves as your main interface for setting up your device, establishing your goals, monitoring your progress, etc. But it does not mean that you have to run in all the time for as long as you’re wearing your tracker—once you set up your tracker, you only need to open it to sync your activities online, posting on social media, or connecting the tracker to your device’s GPS.
The first time you open your Fitbit App, it will ask you to set up your account and enter your information. Afterwards, it will also ask you to connect your tracker. Once your tracker is connected, it will sync your data to your tracker. It takes a few minutes though, but you may leave the app anytime.
 |
 |
Once your tracker is updated, the Fitbit App shows you pages of guides and tips. Most of them are pretty useful, but if you’re as excited as I was to use the Charge 2, it’s going to be a chore.
  |
  |
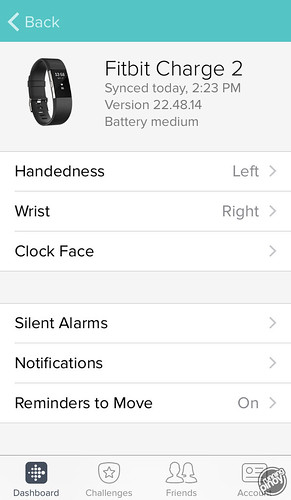
The home screen of the Fitbit App is very busy and can be quite confusing the first time you see it. Let me run you over what some of these screen elements are and what they do.

On the top left of the screen is an icon of your tracker, in this case a Charge 2. I don’t have any other Fitbit tracker so I can’t confirm if it changes depending on what tracker you’re using. On the right side of the icon shows green if it’s connected to your tracker and below that is the battery indicator of tracker. You can tap on this icon to configure and customize your tracker.
 |
 |
The middle section shows how many steps you’ve taken so far, and below that are the floors, distance, calories, and minutes active, in respective order. You can tap on each individual icon to show you a history for that metric. It is quite detailed though so you still have a few screens after before you reach the last page. Lastly, on the top right corner is the Share icon where you can post what you see in this section in social media. You can pick from standard templates or use your own photos as background.
  |
 |
Below that are a bunch of tiles that you may more around to your preference. By default, you have the tile showing hours when you had 250 or more steps and the current heart rate (in beats per minute or bpm) on top. You may add or remove tiles as you please. Like the icons in the middle section, you can tap on each tile for more details.
 |
 |
At the bottom of the screen is a toolbar indicating which page you are currently in the app. The screenshots above indicates that you’re currently at the Dashboard page.
The Challenges page allows you to set up activities for more encouragement. You may do the Adventures on your own but the Challenges are mostly done with friends.
       |
       |
Friends are added obviously on the third page and from there, you’re offered various options on how to find them. The easiest of course is via Facebook as it automatically detects whom among your friends has a Fitbit account.
 |
 |
The Account page is where you can manage both your personal preferences, goals, etc. and all your devices’ settings (if you have more than one). It’s also where you view your Badges and Trophies. Badges are earned depending on the number steps or floors, etc. while Trophies are won from Challenges.
  |
  |
Using the Fitbit App for the first time can be overwhelming because of the number of things you can tap on, with more screens you can go to after that. After a while though, it gets much easier. You just have to remember that anything regarding your tracker, go to the upper left corner; your overview of the day, scroll the Dashboard page; more details and history, tap on the tile you’d like; and finally, anything about you and your preferences, go to the Account page.
The Tracker
The Charge 2 tracker itself is pretty straightforward: it’s a narrow band with a screen in the middle and a lone button on the left. It has a built-in optical heart rate monitor underneath that beams pulses of green light onto your skin. The screen is a graphical matrix of OLED so it does not need a separate backlight and has a portrait orientation. It is most of the time turned off to conserve power but you can turn it on manually by pressing the lone button on the left or turning your wrist towards you. The latter is more convenient but it doesn’t work all the time.
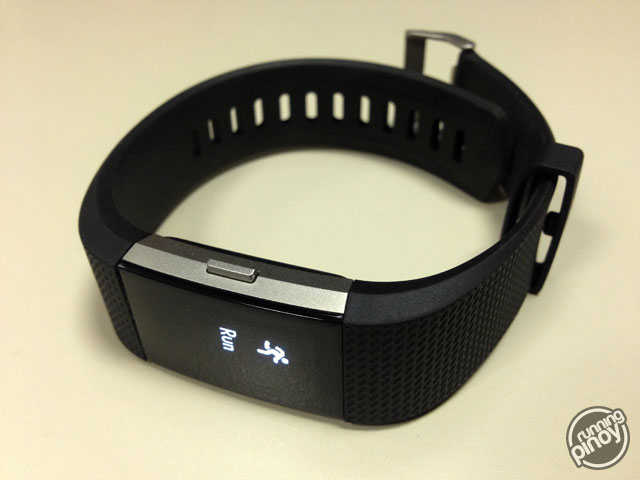
Aside from turning the screen on, the left button also doubles as a menu selector. From standby, pressing it once turns on the screen, and succeeding presses lets you navigate between pages. You select or activate a page by long-pressing the button.
The not-so-obvious feature of the band is that you can tap it for more options. The screen of the Charge 2 is not a touchscreen but it simulates this by accepting taps on the edge of the screen. On the default page of Charge 2, you’re shown the clock face but a tap on the edge of the screen will scroll you through the other content of that page. In the Exercise page for example, the default is Run but doing a tap would take you to Weights, Treadmill, Workout, etc. Note that the order of these contents and pages are customizable from the Fitbit App.
First “Day”
After setting up my profile and preferences in the app, I immediately wore my tracker and forget all about it as I go about the rest of my day. And it was so nice that because of its small form factor you can actually forget you’re wearing a tracker.
Since the year is ending and I became a slack these past few months, I have to do some extra mileage to meet the higher end of my yearly target (366 miles). This Charge 2 came at the perfect moment as the band of my Garmin Fenix 2 broke so I can’t wear it, and I only use my phone to track my runs. I have no issues using my phone’s GPS exclusively to track my distances but it’s not really the most convenient way of doing so due to its size. The Charge 2 still needs your mobile’s GPS though to track your routes (more on this later) but since it’s connected wirelessly, you can put your device in your pocket, belt, bag, etc. and monitor your progress conveniently from your wrist! And so after office hours, I was off to my first run with my Charge 2. A few hours and kilometers later, I yielded this:
I definitely exceeded my Charge 2’s default target of 10,000 steps that afternoon! And to make things much more encouraging, I also earned five badges along the way! While I didn’t pay attention to these as I was running, it definitely felt good to see these achievements after my run. As you may notice from my Instagram post above, the Charge 2 keeps count of your steps, equivalent floors, distance covered (both from steps taken and actual GPS routes), calories burned, and active minutes. These are of course aside from the heart rate.
Sleep Tracking
After a whole afternoon of activity, my Charge 2 is up for its first charge. I was only able to charge it for about an hour as it was already my bedtime and I wanted to check the Charge 2’s sleep monitoring feature. I actually scrolled through the tracker’s menus and the app but I didn’t find anywhere I can let it know that I’m going sleeping. And so I just wore it and forget about it and went to sleep…
 |
 |
The following morning, I was again excited to see what the Charge 2 was able to capture. And when I opened the app (and after it synced with the tracker), I was surprised to find that it automatically detected my sleep and included metrics similar to other sleep trackers like total hours of sleep, number of times awake, and number of times “restless.” I don’t know exactly at this point how it detects you’re sleeping (if it’s time-based or movement-based) so I’m not sure how this feature would work for those working the night shift and sleeping during the day. What I know is that it works!
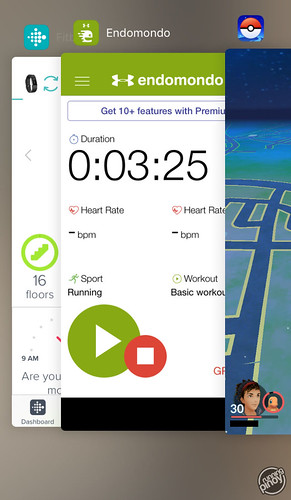
Running with GPS
I know many runners are curious about this particular feature of the Fitbit Charge 2. On its own, the Charge 2 can detect automatically when you’re walking and even running and approximates the distance you covered based on the number of steps. With a paired mobile device with GPS turned on, Charge 2 can plot your route as you move and computes your distance covered more accurately like in a dedicated GPS watch. For this to work though, you have to open the Fitbit App on your mobile device and start Run from the Exercise page (from standby, press the button until you see Run, then press and hold to start). Note that your GPS connection is not yet online if you see an animated line on the right side of the phone icon on your tracker’s screen. You can resolve this by making the Fitbit App active on your mobile device and waiting a few seconds for the tracker to sync. This assumes of course that your mobile device already has an established GPS connection.
To review your runs, open the Fitbit App on your mobile device and select the Weekly Exercise tile. Here you can see all your Exercises (Run, Walk, Workout, etc.) sorted chronologically in descending order. You’ll notice that for GPS-tracked runs, you have a preview map attached. Tap the map for more details.
 |
 |
You’d be glad to know that the GPS-tracked runs of the Fitbit Charge 2 can be exported as a TCX file. This allows you to copy your data to other sites and best of all, the export file includes the heart rate measurements. This can be done though from your PC’s browser via fitbit.com/activities.

Since the Fitbit Charge 2 uses the GPS of its paired mobile device, the quality of the track is only as good as your mobile device. And unsurprisingly, if you use a GPS-tracking app at the same time as your tracker and Fitbit App, the routes would be very identical. The computation of the distance covered may vary though between Fitbit App and other GPS-trackers because of the differences between the algorithm of each app, and other features that may affect logging (like auto-pause).
As far as actual usage for a run, it is relatively simple. You simply need to have Fitbit App active in your paired mobile device to ensure that your tracker has access to GPS, and then start Run. Your tracker would warn you if it cannot acquire GPS data from your mobile device but it will continue tracking distance using your steps until it reestablishes connection. The screen would for the most part be turned off so your either have to press the button or turn your wrist to see your current progress.
Due to the small screen of the Fitbit Charge 2, you can only view two metrics at a time. The default one on top is the current distance and a smaller one at the bottom for the elapsed time. You tap on the screen to scroll through pages like current heart rate (BPM), current pace, average pace, etc. Unfortunately, the bottom part does not change and is fixed to display the elapsed time so only the top part changes. Tapping the screen is also easier said than done while running so getting the data you want quickly is somewhat of a challenge. And not to mention that the screen always turns off after a few seconds.

Heart Rate Monitor
This is my first time to use a wrist-based optical heart rate monitor so I didn’t know what to expect. My prior experience with a heart rate monitor was in a form of a chest strap (Garmin), but I don’t currently have a device that can read off from that so for this assessment, I used the heart rate monitor on the treadmill at the gym. These are those metallic pads placed on handles that read your heart rate as you do your activity, but you have to keep holding the handles to keep monitoring.

For my test, I did a warmup walk of about a kilometer distance. As much as I’d like to do a run on the treadmill, keeping your hands on the handles while running is difficult and could be unsafe so I just stuck with running, varying the speed to force my heart rate to rise and fall as I go along.
At the end of my evaluation, I found a few interesting things: the Fitbit Charge 2’s heart rate monitor shows very similar BPM numbers with that of the treadmill, but it’s not as real-time as the latter. As I increased the speed of the treadmill, I obviously felt my heart rate increase accordingly, and the treadmill’s heart rate monitor reflects this. The Fitbit Charge 2 remained lower than that displayed on the treadmill but catches up a few seconds later to match the treadmill’s numbers (which by that time had different numbers already). The same pattern continued on cooldown as the treadmill shows lower numbers than the tracker. By my rough estimate, the lag seems to be around five seconds so it’s not that long, and the numbers very closely match those of the treadmill.
  |
  |
Notifications
Being connected to your mobile device, the Fitbit Charge 2 also functions as its second screen, but it’s notification is currently limited to calls, text messages, and calendar events. These notifications scroll along your screen horizontally showing either the sender’s name only or including the message. It does not support emoji though (have not tested special characters as well) so if your sender’s name in your mobile device’s address book is all emoji, it will show up as “Unknown.” A box appears in place of emoji in messages.
The notifications may also originate from the tracker as well. One nice example of the Fitbit Charge 2’s own notification is the notice to move 250 steps every hour from 9AM to 5PM (by default, customizable), if you have not done so already 10 minutes before the hour passed (i.e. every 9:50AM, 10:50AM, …). This is a great opportunity for you to have a break, take some steps, and perhaps drink some fluids. The notifications come in the form of subtle vibrations so if you’re wearing the tracker a bit loose, you may miss this buzz.
Perhaps the most unconventional notification from the Fitbit Charge 2 is the extensive use of email. Not that email is unconventional, but the usage definitely is. You get an email for every badge you earn (which may not sound that odd) and you get an email when your tracker’s battery is low (which is very odd). The tracker does not show any notifications for received emails so chances are it’s your mobile device that’s going to do all the notifying as you receive these. Personally, I don’t find these annoying at all as I have a record of my achievements, as well as when I last charged my tracker.

First Week
My first week with the Fitbit Charge 2 covered a bunch of scenarios which included me being active, sedentary, running, walking, doing weights, etc. As I mentioned earlier, I’m trying to eat away the remaining kilometers off my target mileage for the year. I’m doing at least 10K whenever I can so I was able to log in several GPS-tracked runs for the week. This naturally resulted in reaching milestones in terms of daily steps and lifetime kilometers.
On the other hand, this first week also saw me with hardly any activity as I maximized my rest over the weekend. This also gave me the opportunity to get a full eight hours of sleep. When I glanced at my weekly report, that “idle” day sticks out like a sore thumb in sharp contrast of the activities I did for the rest of the week. That, in itself, may actually encourage you to do some activity even on your rest day because it really looks ugly!
I also got to use Weights under Exercise. I don’t really know the computation that it does differently from Walk but it’s there along with other different Exercise types if you really want to get very particular with the monitoring. I probably won’t be using this as much when I lift since I’m not that concerned with how much calories I burned for that particular event but it may be of use for those who want to count it all.
For my first week, I earned these badges (as categorized in the Profile page):
|
Daily Steps
     |
Daily Climb
    |
Lifetime Distance
  |
Summary
For most of the time since I started running, my focus was mostly onto dedicated GPS watches. When fitness trackers arrived, I didn’t take them seriously as I didn’t think I could use them for running. That changed when Fitbit Charge 2 fell under my radar and got me curious. In general, here are my thoughts:
Pros
- Can use GPS from paired mobile device
- Lightweight and slim form factor
- Much more affordable than dedicated GPS watches (SRP ₱8,499)
- Built-in optical heart rate monitor
- All-day step counter with distance calculator
- OLED screen remains visible under bright sunlight
- Calls and text messages notifications
- At least one week battery life even with multiple GPS runs
- Third-party accessories
- GPS-tracked runs exportable as TCX
- Hourly 250-step notification
- Relative ease of use of tracker
- Comprehensive data monitoring and motivating activities on the Fitbit App
- Multi-platform support of the Fitbit App
- Highly customizable menus and settings
Cons
- Low water resistance (not even shower-proof!)
- Screen not always on
- Screen activation by turning your wrist doesn’t always work
- Tapping on the screen can be difficult at times especially while running
- Data fields per page very limited (e.g. only elapsed time + one data field can be seen while doing a run)
- Needs Fitbit App to be running on the paired mobile device to use GPS
- Very limited clock face options
To be honest, I have not even glanced at any of the manuals when I wrote this review and everything you read here are from my firsthand experience! That tells you how easy it is to use the Fitbit Charge 2 out of the box without any tutorials. Sure, there’s some learning curve when your first use it but the features are easily discoverable upon constant use. And I think the Fitbit Charge 2 is the most exciting fitness device I’ve acquired in recent memory as it motivated me to run the first time I put it on! I really like how light and slim it is that I won’t mind wearing it all day and even to bed and how it can monitor my steps, heart rate, and sleep 24/7 without needing to charge for days! I also like how they placed all the customizations in the Fitbit App so you don’t have to tinker too much with the tracker. That reminder towards the end of the hour, every hour, if I’ve not done 250 steps yet is also something that I really appreciate. And because it can use a paired mobile device’s GPS, it can be a cost-effective alternative to dedicated GPS watches.
What I’m a bit disappointed though is that you can’t wear it in the shower and there aren’t that many clock face options. The Run page also has very limited data fields so you have to constantly tap the screen to see the metrics that you need. The screen is a really good graphical matrix of OLED that remains visible under bright sunlight but it’s not that optimized or customizable to display as much or as little data as you want.
Overall, I love the Fitbit Charge 2. It can do what my much more expensive dedicated GPS watch can do, and it goes beyond with a much longer “play time” with GPS on and built-in optical heart rate monitor. The companion Fitbit App is also very good on its own as it’s compatible with various other similar apps and you’re not locked in into their ecosystem as it allows data export as TCX. And the tracker can look totally different with accessories and third-party bands!
With an SRP in the Philippines of ₱8,499, the Fitbit Charge 2 is probably one of the best fitness devices in this price segment. I would definitely recommend it!
* * *
In the Philippines, you may get the Fitbit Charge 2 and other products and accessories online via the Lazada Fitbit Official Store.

One Comment Add yours